Ombré Mountain Nursery

Just wanted to make a quick post and share my babies nursery. The Nursery was inspired by our babymoon trip to Alaska. When your pregnant in Las Vegas in the summer, the only place you can dream of vacationing is anywhere cooler. Iceland was too long of a flight so we settled for Alaska and it was amazing.
Alaska Maternity Photo

Here I am on top of a glacier 27 weeks prego. I wasn’t going to do announcements or maternity photos but decided to snap this picture of my bump because the scenery was so breathtaking and seemed like a fun way to announce our pregnancy on social media.

My Denali

This is the photos I took of Mt Denali that inspired the wall treatment in the nursery.

Ombre Mountain Nursery My bedrooms in my home are pretty big, and I wanted to have a place to crash if needed during those long nights, but also a place to sit while the boy plays. A daybed fit that mark. So I designed this built-in and had the cubbies built and the bed in-between (from IKEA) actually pulls out to a king (two side by side twins) so it also functions as a place for guests, or future sleepovers. Although not sure if boys have sleepovers.

Ombre Mountain Nursery

The crib is from Land of Nod and mobile from ETSY. I also have that big fun pouf from Anthropologie (no longer available) The boxes on the wall serve as a place for books and toys. I wanted to do something different than the much pinned books on a picture ledge.

Ombre Mountain Nursery

Ombre Mountain Nursery

The glider is from West Elm and I will say while it goes so well in the nursery I wish I would have gone with a typical glider designed for baby. The arms on that are a little difficult to deal with while feeding baby, and I cant lay my head back. My first new mom lesson learned.

Ombre Mountain Nursery Dresser was vintage that I refinished a long time ago and decided to keep and happily fits perfectly in this room

Ombre Mountain Nursery

Ombre Mountain Nursery


Ombre Mountain Nursery

it’s very rare when I design a room for my home and bring it to 100% and man it feels good to have a completed room in my house, I think I should do it more often.

And finally here is how I did the walls. I just freehanded the mural all the wal around the room. I chose 3 paint colors from one paint chip (the 3 blues and then transitioned into a warm grey and the top color is the same off white as the ceiling. I made a little time lapse video because apparently I have no shame to film myself 8 months prego in short shorts painting my nursery walls. So excuse the outfit and enjoy the video. (And don’t worry the paint is zero VOC)

ombre mountain nursery pinterest


Secret Favorite Clients|Kitchen Reveal

I covered this kitchen’s before a long time ago and never posted the afters. I figured since it is featured on HGTV’s Fresh Faces of Design and you can vote for this kitchen (you just click on this kitchen scroll though the 8 images and click ready to VOTE) that I should share a little about it’s process. I posted the before’s here and shared this image on Pinterest:

Kitchen Reno


Well let’s get to the after’s shall we?? Sometimes I am amazed how much it looks like the original rendering. In this case it’s pretty EXACT. So we kept most of the original cabinets, all of the cabinets along the wall are the same, as well as the sink cabinet and dishwasher. The layout of the kitchen worked so there was no reason to replace any cabinet that we weren’t changing and that freed up some money.  HGTV Fresh faces Rebecca Zajac

To create the new massive island I designed, I had my cabinet maker fabricate 3 new cabinet boxes. We added a trash pull out per the clients request, and two more large boxes to give the island it’s new square shape. We opted to do the seating area on two sides so it allows for good conversation. When part of the island was drywall, all that space under the seating area was wasted. Now what looks like paneling under the stools is actually storage and makes a great spot to store holiday items you don’t need access to all year long.

HGTV Fresh faces Rebecca Zajac

The butler pantry was enclosed and became a regular pantry. The cabinet that functioned as the pantry before, next to the refrigerator, was fitted with interior pull out drawers to address the lack of drawer issue we had in the previous layout. We didn’t reface the cabinets, we simply re-doored all the old boxes with a simple shaker style door and since they were just partial overlay cabinets we tried to make them look more custom by closing all the gaps between the pairs of doors. In a perfect world we would have done full overlay or inset but since we kept the original boxes we made what was there work. Overall I am very happy with how the doors came out. We also added soft close so it feels like all new cabinets.

HGTV Fresh faces Rebecca Zajac

Some doors got glass and we moved up the cabinet above the range to make room for a professional hood. We relocated the microwave to inside the walk-in pantry. Countertops are Caesarstone Frosty Carrina and I like how they have grey marble like veins with out trying too hard to be faux marble. Marble is beautiful but high maintenance, Caesarstone is a great alternative and isn’t trying to hard to be somethings that it’s not.

HGTV Fresh faces Rebecca Zajac

The backsplash is a custom color Granada Tile and white tiles were added in to break up the over all pattern and give it an organic feel.

HGTV Fresh faces Rebecca Zajac

I think I linked most of the resources in the post. The stools are from Crate and Barrel and the cabinet color was a lacquer color matched to Sherwin Williams Peppercorn.

And I’m not begging, (maybe a little) but please take the time to VOTE on HGTV’s FRESH FACES OF DESIGN for this kitchen. Remember the vote button won’t come up until you scroll though the images or this kitchen and the adjoining dining room that I haven’t revealed on the blog yet.  KitchenRenoDesignbyNumbersPinterest


Secret Favorite Clients | The Fireplace

Let me introduce you to the strangest fireplace ever.

l95c8e444-m3xd-w640_h480_q80

Again, photos from the MLS listing. At first glance the fireplace doesn’t look so bad. However look closer. There’s an odd height step that goes across causing the TV built in to look like it’s FLOATING! It’s so strange. Besides the floating media cabinet the television is also extremely high. The ideal height for a TV is eye level when stilling down, and if you need to mount it a little higher be sure to angle the TV down a little. A high mounted TV like this is like sitting in the front row at the movie theater. It hurts my neck just thinking about it. So the challenge was to save budget by keeping fireplace box in the same location, but re-design the fireplace surround and also design an adjacent media unit that complements the fireplace and balances the wall. I’m not a fan of those build-in media niches but sometimes you gotta just figure out how to work with it.

Secret Favorite Clients| Fireplace

The plan is to use a mid-century inspired brick veneer and go floor to ceiling around the fireplace and that weird step has got to go. The media unit is going to be simple cabinets with pretty knobs, and a simple modern mantle will tie the two together. Wanna see!? Secret Favorite Clients | The Fireplace Boom! Looks so simple but that design had me stumped for a good 5 hours trying to figure out how to make the existing placement work and look intentional and balanced. We could mount the TV but it really didn’t need to be mounted, and call me weird but I think it looks better on it’s stand in this situation. All the media equipment will be hidden behind those pretty white doors and an RF reader allows you to control the equipment without seeing it or having to open the doors. I’m not one to try to hide the TV because I think it’s unrealistic to pretend like we don’t watch it. If your lucky enough to have a separate living room, by all means omit the TV from that room, but in a family room just design around the reality that if you try to hide it behind door those doors will always be open and looking a mess. Rant over. Above the TV lends a perfect spot for some pretty leaning vintage artwork. I was aiming to keep this design simple and pretty, a nod to the mid-century without screaming MID-CENTURY. I really think the world eclectic has been overused about as much as the word epic, so I hate to say this home is “eclectic,” but it really is a modern mix of cozy, relaxed and all things pretty. Want to see the rest of the family room!? It’s coming I promise, along with the living room, dining, bathroom and laundry room.

Secret Favorite Clients | Fireplace Re-Design


Secret Favorite Clients | The Kitchen

Has it really been since Valentines day that I have posted!? Oh man does time fly. Well I’m excited to introduce a new series covering the redesign of my new secret favorite clients home. I call them my secret favorite clients not only because they are awesome, but because their style is so close to mine it’s like designing my dream home. So, I’m going to start the series off with their kitchen. This may be the most exciting kitchen redesign I’ve done to date. Not just because the after is going to be amazing, but because we are working with a lot of the existing kitchen making it a more affordable, realistic kitchen reno as compared to a full gut. So let me introduce you to the before:

Kitchen MLS  Listing Kitchen MLS  Listing Kitchen MLS  Listing These pictures are from the MLS listing on the house and in no way reflects my clients style or taste. The house is currently very beige and bland. The wall color, although looking olive in these pictures, is like a peanut butter beige The floors are white 18″ tile and the cabinets are an orangey cherry wood. It isn’t terrible, it’s just very builder grade feeling and the design is very 90’s. So whats the plan?

kitchendemo This picture is more true to color than the MLS listing, check out those orange beauties. Some major things happening are all new flooring though out the whole home. We are also removing the weird wing wall attached to the island and giving the island a complete overhaul. Since we are keeping the cabinets I plan on just reworking the island once the rounded drywall and dated granite is removed. Plumbing will remain in the same spot. This kitchen functions well and no need to spend budget on rearranging anything. That odd “butler pantry” will get a door and become a regular pantry and the pass though to what is currently the formal dining room will be closed off. We are also moving the microwave into the new walk in pantry and moving that upper cabinet up and installing a hood giving the cabinets a bit of a more custom look. We are not “refacing” the cabinets since we are painting them, we are simply redooring them to a timeless shaker door some with glass inserts and the entire kitchen is getting a coat of medium grey paint. Also a new lighting plan with pendants will be installed. Are you having a hard time picturing it? No worries, check it out!

kitchen rendering It’s like a completely different kitchen, while not really. The biggest difference is the island will be a normal rectangular shape, removing the weird wall opens it up and the pendants add personality. OH and that backsplash!? We did splurge a bit on custom colored cement tile and I mixed in some solid tiles to break up the pattern a little and make it feel a little more organic. It gives the illusion of wallpaper with the durability of tile. I’m obsessed.

Demo starts next week so be sure to follow along. I’ll be covering the great room design, new dining room, and formal dining converted to living room design before this week. There’s also a laundry room, full bath and powder room in the mix.

Kitchen Reno


DIY Valentines Photo Backdrop

Here’s a sweet little Valentine backdrop that’s super easy to make, and the photos make for awesome Valentine gifts. All you need to create this backdrop is red fabric or background paper. I purchased this red muslin from Amazon for only $16.99. You will also need white cardstock (you want something a little thicker than regular paper) scissors and white duct tape.

Step One DIY Valentine Backdrop

To start, just cut out a bunch of different sized hearts. First fold your paper in half and cut out half a heart. That way your heart is symmetrical and has a crease down the center. I cut out 4 different sizes and then used those sizes as templates to make the rest of the hearts.

Step Two DIY Valentine Backdrop

Next step is to tape your red backdrop to the wall. I used red duct tape but any color duct tape will work. I also let my baseboard show since I thought it provided a nice transition to the wood floors. If you don’t have wood floors you can use a fuzzy rug or faux wood floor photo mat. After your red backdrop is up, add a loop of duct tape to the back of one side of your hearts.

Step Three

And last step is to tape the one side your heart to the wall so the other side “pops” off. Make sure you use white duct tape for this so that way the color of the tape doesn’t show though the white heart and it’s strong enough tape your hearts don’t fall off.

DIY Valentine Backdrop

I have photography lights but if you have a room with a good window, natural light is best. I only use my lights when I don’t have daylight. You can also use a flash, you don’t need a fancy setup to make these photos look awesome. DIY Valentine Backdrop

Then just make prints of your favorite photos. One of my favorite places to get prints is Minted. They add a bit of elevation to ordinary prints and turn them into “Art.” They are also offering awesome Valentine inspired prints. My favorite that goes great with this backdrop is the XOXO print. And they are also offering free 2-day shipping on art and gifts over $75 with code VALENTINEFS2.

MInted XOXO Print

Also be sure to check out Minted Art Gallery as well for awesome prints. I love using Minted Prints on my Custom Gallery Wall designs. The prints are made from Independent Artist and I can always find great prints that reflect my clients personality.


Master Bedroom Sneak Peek

I’ve been neglecting my blog, again. I still haven’t found the balance of working on spaces for clients and then posting content for readers. Anyone have any tips I’m all ears 🙂 Anyways, I just wanted to share this sneak peek of my master bedroom. It’s been a work in progress since 2010, I just couldn’t get the balance of elements right. Although it’s still not finished, I still have to re-paint walls, add molding to windows, and switch out the dresser situation, the view of the bed is almost 100% complete. And when I say 100% complete, I mean I’m still swapping out those drapes. When your a designer, and it’s your space I have to say you are never done but now that I feel happy with the bed area, I am happy to share it.  Rebecca Zajac Master Bedroom The wood wall is pine shiplap. My husband and I installed back in 2010 when wood walls were trending HARD. I think I saw a wood wall somewhere, wanted one, installed it, and then when the reclaimed walls were EVERYWHERE I wanted to rip it down. I was just sick of seeing them everywhere, but my husband opposed, he loved it and I felt determined to make it work and not feel too trendy. It’s not reclaimed wood, so I felt like I could make it work without it feeling like I jumped onto the reclaimed band wagon. The floors we recently installed and happened to match the wall pretty well. Read a little bit about operation rip out carpet here. I designed the end tables, and made the top, my husband welded the base but by popular request we are in the process of making and listing some of them for sale. Speaking of sale, be sure to check out my items on Chairish. I don’t have an e-commerce site for my vintage and handmade goods yet but I really enjoy selling them on Chairish. They do the advertising, take a little percent of the sale, and take care of shipping. I am more than happy with that kind of online relationship. So speaking of my Chairish shop, I made those pillows on my bed and I have similar ones for sale on Chairish. I will have more indigo pillows made soon, if you are interested in purchasing anything you don’t see just email me. The stools from the end of the bed are from Wayfair. I didn’t like how shinny and new they were (it’s actually two benches even though you can only see one) so I used a deglosser on the wood to take some shine off and I’m distressing the leather by leaving my wet towel on them daily. The bedding is a white linen duvet, you can see my recommendations for white bedding here. The rug is Potterybarn and it’s much bluer like my picture, not dusty blue like the Potterybarn picture. Lamps are West Elm but I added a larger whiter shade. And the draper are vintage West Elm, but I am going to replace them with simple white panels. So if you interested in those existing panels they will be for sale, I own 8 panels and they are about 104″ tall. I will share the DIY for the wood wall in an upcoming post and I will share the remaining images of the room when It’s complete.

Bex


Champagne Cupcakes and Champagne Jello Shots

Back in 2011 I posted this recipe for NYE themed cupcakes and champagne jello shows. The recipe is actually really yummy and since I shared it before I had many readers, I decided to re-post my own post. Hope that’s not against blog rules. BTW since the post is circa 2011 I believe that was like iPhone4 time frame so excuse the burly pictures. If I remake these this year I will be sure to reshoot proper photos!

Here’s your shopping list:
1/2 cup unsalted butter softened
1 cup granulated sugar
2 eggs
1 tsp vanilla
1 3/4 cups flour
1/2 tsp baking soda
1/4 tsp baking powder
1/4 tsp salt
1/2 cup sour cream
1/2 cup champagne, I used Sofia Blanc de Blancs sparkling wine

Preheat oven to 350 degrees. Mix together the softened butter and sugar until it’s well incorporated and beat until light and fluffy. Then add eggs one at a time and beat the mixture well after each egg. Then add vanilla and beat the mixture some more to make sure all the ingredients are well mixed and light and airy. (there’s a lot of beating involved in this recipe) This is a dense cupcake batter so I like to try to make it as airy as possible. Next in a separate bowl shift flour, baking soda, baking power and salt. Then in another separate bowl (yes you will have 3 bowls going on at one time) whisk together champagne and sour cream. Careful of the bubbles. Now add flour mixture and champagne mixture alternately to the butter mixture. Make sure to start and stop with the flour mixture. Then be sure to mix everything together really well. Spoon batter into cupcake pan with cupcake wrappers, fill the molds about 1/2 full. Bake 17-22 min… just until the cakes are starting to turn light brown on top and a toothpick comes out clean. Don’t over bake or you’ll be left with dry cupcakes.

I found that since the champagne crystalizes as you bake you will be left with little sugary crystals in your cakes… yummy.

For the champagne buttercream frosting:

3 tbsp. champagne or sparking wine (I used Sofia again it’s my favorite sparking wine)
2 sticks of butter softened
2 1/2 cups confectioners’ sugar

In an electric mixer, beat together soften butter and powdered sugar. Once your have nice thick and fluffy frosting slowly add the 3 tbsp. of champagne to the mixture mixing well. You can add more or less to taste just be sure if you add more to adjust the amount of powered sugar you add so you don’t end up with watery frosting.

Put frosting in a pastry bag and just cut off the tip and frost cooled cupcakes (yes important be sure your cakes are cool this is a buttercream frosting and will melt on warm cakes) Then I topped with pastel yellow pearlized sprinkles to look like bubbles. (you can get this sprinkles from Michael’s if you can’t find in grocery store, I think Party City (coupons here) carries them too.) Make sure to keep your completed cakes in the refrigerator and serve and enjoy!

Then onto the champagne jello shots:

Shopping list:
2 packages Mixcheif by Jello, add your own juice… .25oz packages
pineapple juice (pasteurized, this is important or it won’t set up)
champagne or sparking wine (again I used Sofia)
peach schnapps and/or St. Germain (this is an elderflower liquor it’s super yummy)
sliced strawberries

This is what the jello package looks like:

So here’s what I did:
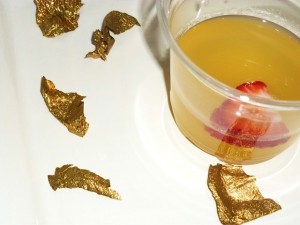
Combine 1/2 pineapple juice and 1/2 water and bring to a boil. Slowly mix in the 2 packages of jello and let boil while mixing for 3 minutes to be sure jello mixture is dissolved. Then take off heat. I added 1 1/2 cups champagne (with a little peach schnapps and St. Germain in the champagne mixture to sweeten it up) to the hot jello mixture, poor into cups, throw in a sliced strawberry and chill for at least 4 hours. Then ta-da, New Years Eve jello shots.

Just a note, you can’t use fresh pineapple or the jello won’t set due to the enzymes. Pineapple juice is pasteurized and the enzymes are killed during this process, and boiling the pineapple juice also breaks down the enzymes so it will gel.


A New Years Tablescape


New Years Eve Tablescape

New Years Eve Tablescape

Hope everyone had a wonderful holiday. It’s that time of year we reflect back on the year and come up resolutions for the New Year. I like to keep my resolutions simple, so I don’t feel guilty for breaking them. So my resolutions are to continue growing my business, and try to do my laundry once a week so it doesn’t get completely out of control. To celebrate this New Years Eve, I wanted to design a simple tablescape using mostly items I had around the house. I don’t like to go too heavy with themes for parties, that way I can reuse elements the future. I started out this table with a simple color pallet of blush, black, white and metallics.

111

For this tablescape I reused the Target runner and ball garland hung on the chandelier I had picked up for Christmas. The blush and crystal glassware are vintage. However, the good news is I’m going to be listing those items for sale on Chairish. They are a great site for sourcing vintage items, so if you love these exact items they could be yours! (when the listings go live I will update the post with links) A similar set of crystal stemware can also be found here. The dessert plates are vintage china,
and yep, you guessed it those will also be listed on Chairish as well. The cake stand is also vintage and was a gift but you can find a similar one here.

1

The rose gold and pewter cantle sticks will be going on Chairish as well. Seeing a trend yet? The white vase is Dwell studio. I normally use that vase on my table with some dried Billy Balls, but I did a simple blush arrangement of peonies and leftover Christmas greenery. The tea light holders are West Elm.

New Years Eve Tablescape

The black vase is West Elm and napkins are Target. Since I was mixing all metals; gold, rose gold, and silver I just used my normal day-to-day silverware. There are pretty gold and rose gold sets that would have looked nice as well. The mini party hat is from an older OhJoy for Target collection but sadly are no longer available.

777

The mini copper pitcher is vintage and will be the final item from this tablescape I’m listing on Chairish. I know I said I like to reuse items for future parties, but I also have so many items I’ve collected over the years, doing this post and listing a curated collection seemed fitting since I’ve already photographed these beauties.

New Years Eve Tablescape

I really like how this tablescape turned out. It’s collected and a perfect mix of vintage and new. I like to encourage people to collect some special items to go with their day to day kitchen wares. Things to look for are pretty salad or desert plates, special occasion stemware, pretty cake stands or serving trays, and candle holders. These items can be mixed into basic place settings to create a beautiful tablescape.

New Years Eve Tablescape

And because I created this table a few days early to share with my readers, don’t worry I wasn’t too lonely setting up a party table by myself.

Party Chihuahua

I had my little party animal to enjoy the party with! Cheers to a New Year!


Simple Christmas Decor

Christmas is right around the corner, and to be honest, I’m a bit behind in my decorating. We are laying low this year, and with no planned parties at the house it seamed silly to dig all the boxes out. So I kept it simple this year. Target had some great affordable Christmas options so I decided to just buy some new items and style my sofa table two ways and pick my favorite.

My Fiddle Lead fig is getting big, and I figured he could play nicely with my mini potted Christmas Tree. I bought a live tree this year, I just wanted something small and maybe I can keep him alive until next year. I really don’t know how long those guys can stay in a pot so if he starts to look stressed I may plant him and hope for the best. For now it’s nice to have a live tree and not worry about it drying out.

Colorful Vintage included some cute colorful LED lights on the tree. I haven’t used colored lights in years, and my husband loves them. The LED’s do grow brighter than old school colorful lights, but they are super fun. My vintage brass deer live on that table year round, so I just left them to play and added a fun colorful Nutcracker to my terrarium. Last I popped on two colorful pillows, the super cozy red knit pillow and the vintagey scooter pillow. I normally don’t do red because it seems really warm next to my “golden rod velvet” 70’s style sofa, but I think it works here. I think this look is fun, and definitely different than how I usually decorate.

Super Simple Christmas Decor

Simple Sparkle is pretty neutral and doesn’t scream Christmas as much as Colorful Vintage did. A large cozy cream pillow (similar here) came in with my “vintage” West Elm sequin pillow (similar here) and a cozy grey fur blanket. The colored lights got switched out for warm white lights. Last I grabbed this less poppy nutcracker to complete the look.

So this year Colorful Vintage is what I went with. It just felt so different from my normal Christmas decor, and since that little table is all the decorating I did this year, it’s nice to have those poppy colors.